Roof Cooling
` Shop Now Get A Quote
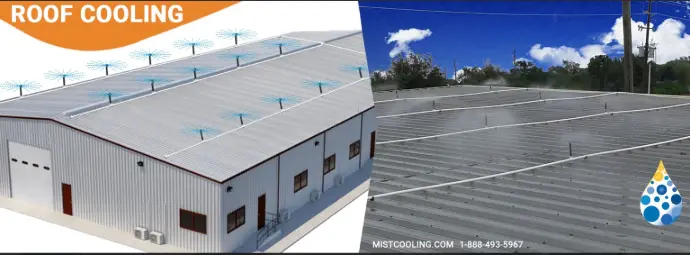
Roof Cooling Application
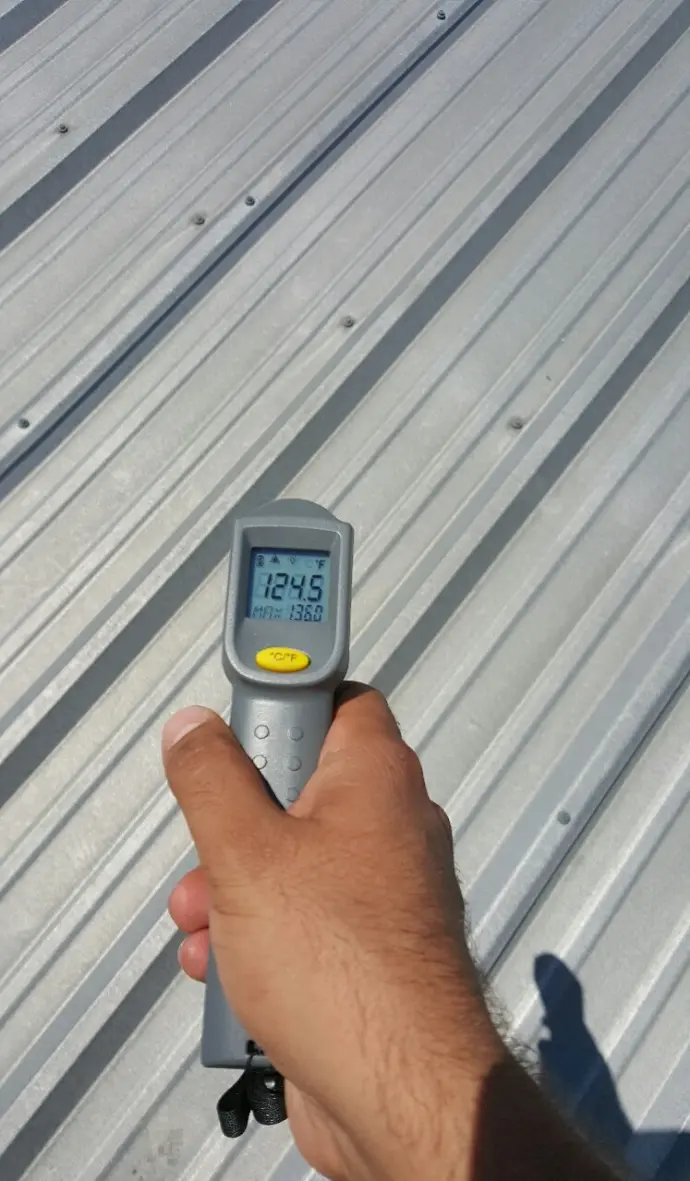
A Hot Roof Means a Hot Everything!
A high-quality roof cooling system from Mistcooling.com is the answer you have been looking for!
- In many facilities, a metal roof can be the primary contributor to heat inside the structure.
- Energy efficient and environmentally friendly.
- Creates a pleasant visual effect.
- Easy to install.
- Easy and inexpensive to maintain.
- Our variety of system types and sizes means we will have an option that meets your needs.
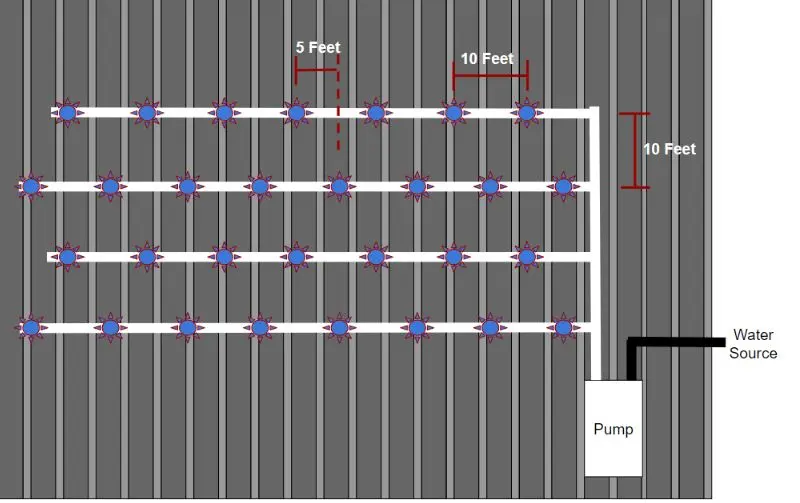
Diagram Of Roof Cooling System
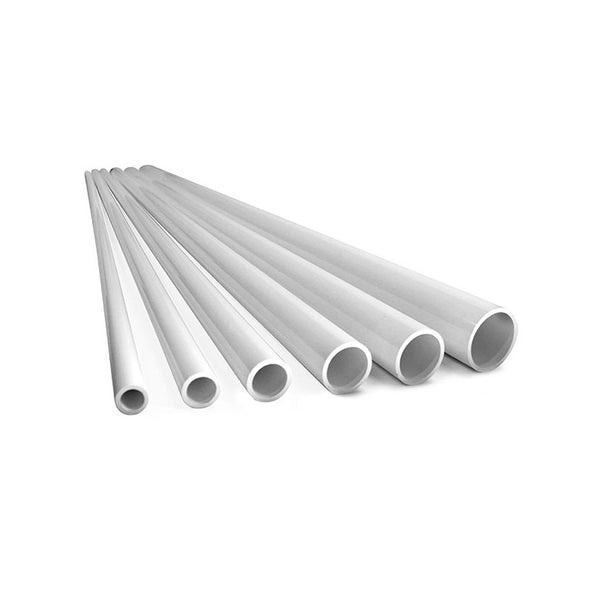
3/4 INCH PVC REQUIRED
You will need 3/4 in PVC to complete full connection of your run. We provide
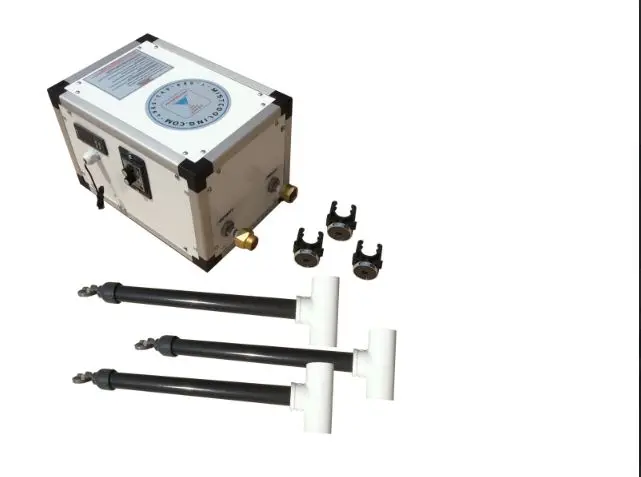
- 1x High Flow roof cooling mist pump with built-in thermostat and cyclic on/off timer
- 360° Degrees Misting Nozzle Risers
- PVC Magnetic Clamps
- Necessary Fittings for DIY installation
In order to save on shipping we do not provide 3/4 inch PVC, however this is easily found at your local hardware retail store and assure you is easily obtainable. We recommend purchasing from your local retailer for better cost efficiency.
Please visit your local retailer.
How does mist cooling work?
Mist cooling combines 2 scientific principles:
- Enthalpy of Vaporization: When water evaporates, latent heat energy is used to break the bonds between water molecules, allowing them to transition from a liquid state to a gaseous state. As a result, the surrounding environment is cooled.
- The principle of increased surface area: A larger surface area allows more molecules to escape into the air, facilitating a faster evaporation process.
Combining the scientific principles:
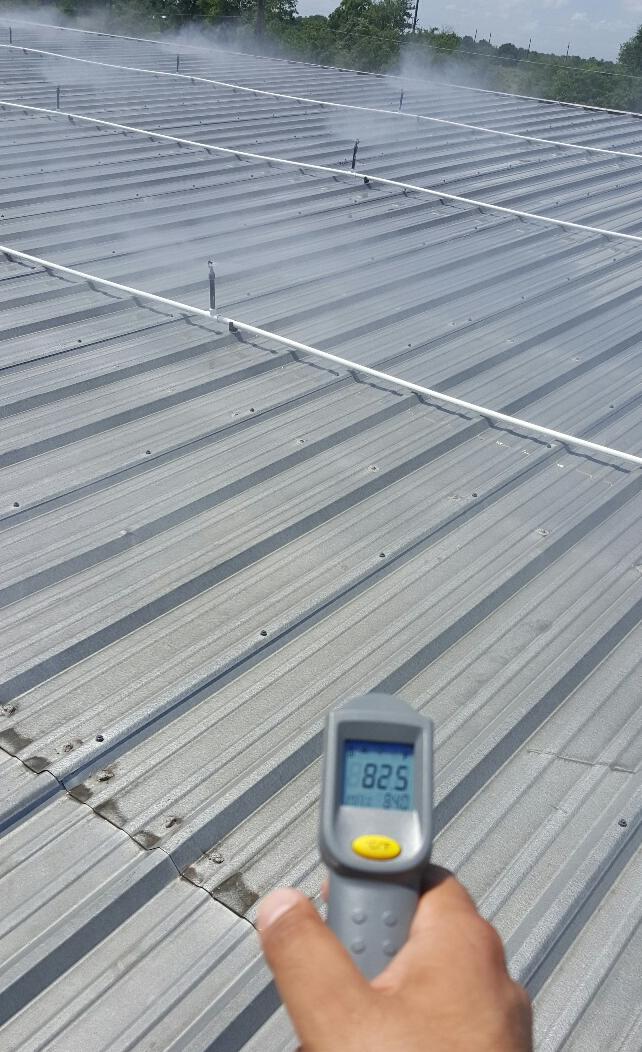
By creating an ultra-fine mist of water droplets, measured in mere microns, almost all of the water is exposed to the air immediately. The resulting evaporation is so fast that a tremendous amount of heat is absorbed in the process. By constantly supplying and evaporating mist, rapid cooling can be achieved without getting things wet!
Roof Cooling System
- 1x High Flow roof cooling mist pump with built-in thermostat and cyclic on/off timer
- 5x 360° Degrees Misting Nozzle Risers
- 5x PVC Magnetic Clamps
- Necessary Fittings for DIY installation
- Requires 2 Weeks Lead Time per order
Pump Manual available below
https://docs.google.com/document/d/1E1ZisVU4Oi3QOyLU8xMLUqF0XL-Coidf/edit
The misting pump that you get with the roof cooling mist system is UL approved and ideal for outdoor use. It is powerful, being able to exert a maximum of 250psi;, for increased range of spray. It has a steel enclosure that protects it from external damage. The misting nozzles that come with the misting system are 360 degrees adjustable, and the spray pattern has a large diameter, of 10 feet.
Additionally, the fitting and installation accessories negate the need for any holes to be drilled in the roof. This not only makes it more convenient, but it also protects the structural integrity of both the roof. The user has the choice to utilize their own choice of tubing, in order to connect the pump to the risers. The roof cooling misting system is also fully expandable, adding to the overall range.
Installation
Pump Installation Instructions
- Place the Roof cooler pump in its preferred location. Placing it on the roof near the system is preferable. If it cannot be placed on the roof, it is best to locate it as close to the input location of the roof cooling lines.
- Pump must be level.
- Water should be supplied to the pump inlet (black) a using 1-inch minimum source hose/pipe. Using smaller than a 1-inch supply can restrict the pump’s needed flow and damage the unit.
- Plug in the power cord to dedicated 20-amp 120 Volt receptacle. (Use GFCI)
- Priming is not necessary when a pressurized supply is available.
- Do not run the pump dry.
Output Installation Instructions
- Attach 1-inch PVC plumbing to output (white) of the pump.
- 1-inch piping is required between the pump and the output lines.
- Install the drain valve at the lowest point of the line as discussed in the design consultation for your system.
- Use the 1-inch to ¾-inch reducer (supplied) to transition from the 1-inch line to the output lines.
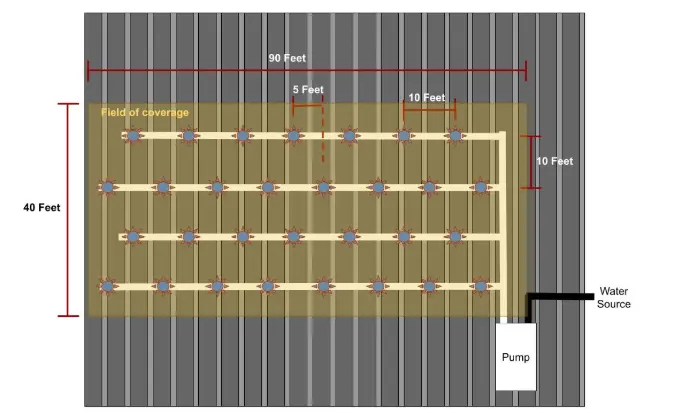
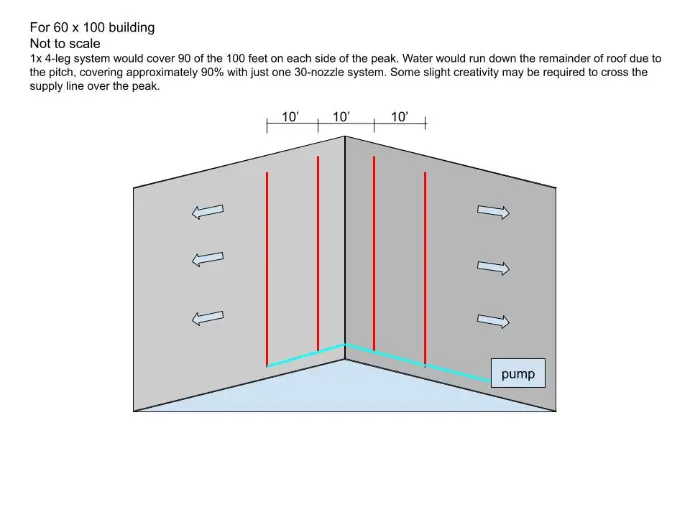
- Run the ¾-inch roof misting line parallel according to the design discussed in the planning stages of your system. Standard layout has lines spaced every 10 feet
- For proper roof coverage, stagger the location of Roof misters at 5-foot intervals in relation to the parallel line. Each line should have roof misters spaced every 10 feet. (see picture below for an example).
- Secure roof misting lines with the magnetic clamps (provided).
- Ensure that adequate time is allowed for any PVC glues to dry before turning on the system.
Maintenance
Winterization:
- To help maintain the integrity of the system and to prevent unnecessary damage, it is important to winterize the pump and other components of the misting system BEFORE temperatures drop below freezing. As water becomes Ice, it needs more room to expand. Even one night of freezing temperatures can damage the pump, lines, fittings, and/or nozzles. Any damage to system or components due to freeze is not covered under warranty.
To winterize
- Unplug the pump.
- Remove access cover.
- Drain all water from pump by unscrewing the drain plug from the base of the pump.

- Open the solenoid valve manually.

- Wind up power cord.
- Store pump, drain plugs, and any other loose parts in a secure location.
- To avoid condensation/corrosion problems, do NOT cover or wrap pump with plastic film or bags.
- Open drain valve on the 1-inch supply line between the pump and the misting lines.
- Open drain valve(s) on the end of misting lines(s)
- Allow water to full drain from system.
De-Winterization:
- Close the solenoid valve back into the “Auto” position (see above).
- Follow Installation steps to flush/purge lines before operation.
- If pump fails to start after shutdown period: Disconnect all power before servicing. Insert a 1/4” hex key into the center hole of the fan guard and rotate motor shaft to free seal. Completely remove the hex key before reconnect power source.

Protect from Heat:
- Keep the unit in a well ventilated location to prevent overheating.
- Provide ample cross ventilation.
Protect against Dirt:
- Protect from any foreign matter or splashing water.
- Do not store (or spill) chemicals near the unit
- Avoid sweeping or stirring up dust near the motor while it is operating.
- Damages resulting from a failure to protect this unit may void the warranty.
Protect against Moisture:
- This unit comes in a weather resistant enclosure to protect it from rain. However, the unit cannot be submerged in water.
- It may still be advisable to cover the unit(s) in the event of extreme or catastrophic weather, eg. hurricanes, tornadoes, blizzards, etc.
- Do not allow the pump to operate if it has been flooded.
- Flood damage may void the warranty.
NOTE: DO NOT wrap the unit with plastic or other air tight materials. The unit may be covered during a storm, for winter storage, etc., but NEVER when operating or expecting operation.